IMPORTANT: IF YOU ARE HAVING PROBLEMS PLEASE CONTACT ME DIRECTLY BY EMAIL.
Help and advice to get it running.
PCB track layouts TOP:
PCB track layouts BOTTOM:
v1,11a PCB track layouts TOP:
v1.11a PCB track layouts BOTTOM:


IMPORTANT: IF YOU ARE HAVING PROBLEMS PLEASE CONTACT ME DIRECTLY BY EMAIL.
Help and advice to get it running.
PCB track layouts TOP:
PCB track layouts BOTTOM:
v1,11a PCB track layouts TOP:
v1.11a PCB track layouts BOTTOM:


Ok so heres the deal. my thermo is all together but..... no data is displayed. i can switch modes and the nixies will display k/f/c/%h. but the others nothing, no led. but if i put it in scramble i belive it to be the mode, it will scroll back and forth across the other 3 nixies. no data mind you but lust light up the led and almost like it lights up the cathode in them very quickly? what did i do wrong?
Also it will not power on without something between r28. no mention of a resistor in the instructions.
No data is exactly what the problem is, it's not reading anything from the sensors. Check the surface mounted IC is the right way round and there are no bridges, then the data lines from there to the PIC, watch for a bridge at the top end of R11 and R12 and between the centre pins of the DHT11 sensor.
I've added the bit about R28 to the instructions, not sure how I missed that.
Tony, i double checked and triple checked. installed the r28.No bridging. still no data. could i have a bad sensor?
As it uses data from both sensors an internal short in one could prevent the other from working. Remove the SM IC, if it still won't display anything check with a meter for a short between the middle pins of the DHT11 and from those to 5V/ground. If that's OK you probably do have a dead DHT11.
Tony. looks like a dead dht11. bummer
The fastest way to replace it will probably be to buy one on ebay from a US seller and I'll refund the cost, it should only be a couple of $.
No worries Tony, i got one coming from amazon. be here tuesday. thanks for your help!
Is there a schematic of the Nixie thermometer avalable??
Not as yet. If there are enough requests I may have to draw one.....
Tony, got a new dht11 and the thermo is running great. very happy.
Tony, I got the kit put together and everything worked (all blue LEDs lit and tubes displayed temp in F and humidity) except I couldn't change modes using the IR LED. I unplugged it, checked all the connections, re-powered it and everything worked except no mode change and now it displayed in K. The next time I plugged it in only the blue LEDs lit up steadily. Now when I plug it in it does nothing (nothing lights up). I'm hoping it just changed to 'off' mode, and I am wondering where I should look to troubleshoot the mode change problem.
Starting with the easy things, did you make the solder bridge on pin 10 of the pic (last post in the assembly thread), it's easy to miss. Check the IR LED is lighting (there should be a faint red glow) and that the sensor is pointing slightly to the left of up (inclined towards the LED)
Ah, I had missed the solder bridge. Unfortunately that didn't fix the issue though. It looks like my IR LED is not working. What specifics should I look for in a replacement?
The LED used is an epitex l850-36UP but almost any medium power IR LED could be used in its place. They're usually very reliable though so make sure it's in the right way and there's nothing else that may be causing it to not work. What's the voltage across R2?
Across the pins of the IR LED I get 4.4, but across R2 I get 0.0.
Looks like it's either open circuit or in the wrong way - try turning it round just in case. If it still reads the same can you find a replacement locally or would you like me to send you one?. Any IR 10-60 degree LED will work though you may need to inrease the value of R2.
I turned it around, and now am reading 2.8 across R2, and 1.15 across the IR LED. Still won't display anything.
Is the IR LED glowing now?, if so could you post or email me a photo of the PCB solder side. The problem is almost certainly around IC3 or the IR LED.
If the solder bridge is missing noise from the inverter is picked up by the floating pin on IC1 and eventually tricks it into thinking it's a valid signal, it'll cycle until it switches off and the noise stops.
The IR LED does indeed glow faintly now. Still no luck on getting the nixies or blue LEDs to light up. I will send you a pic of the board.
Everything looks OK there.
What's the voltage on pin 10 of IC1 and does it vary slightly when something is near the IR sensor?. Also the voltages on the other 2 pins of IC3 would help.
IC3 shows 0.1V / 0.0V / 0.1V for it's 3 pins
I'm not sure how to tell which pin is 10 on IC1. As I look down at the top of the board with the front of the nixies facing me, starting from the upper left end I get:
2.3 / 5 / 0 / .02 / 0 / .02 / 0 / 0 / 0
on the row nearest me starting from the left I get:
varies from .04-.2 in response to hand movement (hey, this must be pin 10) / 5 / 3.9 / 5 / 5 / 5 / 0 / 5 / 5
The 5V supply to IC3 is missing. Check the voltage at either end of R14 and try removing C4 in case it's faulty.
R14 reads 5v on the right side and the left fluctuates between .05 and .33
Should I replace C4 with another 10n ceramic capacitor?
Just remove it for now. Check R14 is still 100R not open and for shorts to ground on the 2 end pins of IC3. There should be 5V at both ends of R14.
I removed C4 (unfortunately destroying it in the process, but that's no big deal) with no change. I've checked everything else I can think of and am not finding anything. Can you give me some pointers on exactly what to check?
What were the readings across R14 and could you supply a photo showing this part of the board?.
R14 checks out as 100R. I sent you an email with a couple of photos of the board.
Looking at the bottom photo, there appears to be something between the top pad of IC3 and the unused pad next to it on the right (which is connected to the centre pin of IC3). It may be just dust, but that is the area the fault will be in. The 5V supply to the IR sensor is being shorted to ground.
Check the resistance between those 2 pads (it should read between many Kohms and infinity depending on your meter) and look for any bridge between those pads, the pads of C4 and the pad of R14 next to C4. scrape around them with a scalpel blade to make sure. You could remove IC3 just to make sure it isn't the fault but I haven't had one die yet.
I just got my thermometer together tonight. All the nixies and leds light up. The IR led works and I can switch through all the different modes. So what's my problem?
The displayed temp is quite a bit higher then actual. After I let it run for a few minutes it settled on 79.7.โ but I know my house is 74 or lower. Any idea what would cause this? How accurate should it be?
Reading the other threads I stumbled on this:
viewtopic.php?p=285#p285
and Tony's reply...
Just to clarify, I did attach the heat pad, paying close attention so that it would be square under the IC. I plugged it back in this morning and the temp started at 71.5, which is probably lower than actual. Every time the display cycled to humidity and back it would raise the temp a few points: 71.5 to 71.8 to 72.0, etc. So it was a pretty quick rise in temp, not an hour like the other post.
The temperature at startup will always be 20 degrees C or the equivalent, the software integrates samples over time so it can take up to 60 seconds to reach the actual temperature. If it's in the case and the heatsink pad is fitted make sure the soldering round the TCN75 is OK - if the controller can't read valid data from the IIC bus it falls back to the DHT11 reading, which will be at the internal case temperature. (I may remove that if I update the code, it was intended as a backup option for anyone who didn't want to solder a SMD device but that hasn't really been an issue)
Inevitably though it is sensing the temperature of the case bottom which will be heated by the 2W or so dissipated inside. An external sensor is the best way to get an accurate reading.
Is there any way to tell/test to determine if the TCN75 is soldered and working correctly? I did have some trouble soldering this in the correct place...
Short, sad story: I first tried to solder the chip to the SMD pads on the far right of the PCB. I was cussing up a storm because the pads were too close together for the little chip. It wasn't until I tried to solder and remove it twice that I realized I must be doing it wrong, checked the instructions again, and slapped myself in the forehead. It's the 7 pads more towards the center of the PCB!
Anyway, I've visually checked the TCN75 solder points and I can't see anything amiss. Anything more scientific I can do?
Update on temp: I'm brought the thermo to work with me and will let it run all day. So far, it is up to 82.8F and I think the building is kept pretty constant at 75-ish. I will update at the end of the day.
That is a long way out. Probably the easiest way to test will be to heat it up - apply some heat to the TCN75 from under the board while trying to avoid warming the DHT11 sensor. If the reading changes quickly (before it warms up the PCB) it's probably working.
Yeah...I'll check it when I get home.
Just as an update, looks like the temp is holding steady at 83.3. The bottom of the case is fairly warm, primarily at the back, near the T12, which makes sense I think. Looking over the case assembly instructions one more time and I can't tell if the silicone pad should be under the DHT11 or the SMD. I think I might have it more under the DHT11, which is a little further to the left. I will check that too when I get home.
What does the SMD do? I figured the DHT11 was the temp and humidity sensor, but an earlier comment made it sound like the SMD drove the temp.
The DHT11 is only used for humidity with the temperature being supplied by the TCN75 as it should be accurate to +- 0.5 degrees C or about 1F though the case heating causes some error. The silicone pad should be sandwiched between the IC body and the base, under the PCB.
Well I'm at a loss...the SMD definitely is driving the temp. Testing my finger against the chip causes the temp. to start increasing pretty obviously and an ice pack brings it back down. When I try the same thing on the DHT11 nothing happens. When the board was out of the case it was still running a degree or two hot, but much better than before. Moving the silicone pad seemed to help a bit too. But once it's back in the case the temp. quickly climbs back up into the 80s. Any other ideas for what I can check?
Could you measure the drop across R28 just in case there's some problem causing it to use more power than expected?. There will be some self hesting but it shouldn't be as bad as this.
I touch either line of my multimeter to the two sides of R28. When the nixies are lit the voltage reading is 150mV. If it's just the LEDs or all off then the reading is only 10mV. I guess that's 0.14V to 0.01V. Is this normal? Anything else I should test?
That's around 300mA so close enough. I've been working on the code to switch off the HV during display blanking. Do you have access to a pic programmer?.
No, I don't...
How much do they run? Do you have any suggestions for model, etc? I've never done any programming or loading programs...is it very complicated?
You should be able to find a Pickit 3 for $40-45 or a Chinese clone for less, probably even with a ZIF socket adapter which will make programming much easier than connecting directly to the PCB.
Install MPlab (free from Microchip - the main reason I use them is the cheapness of dev tools. I bought a Freescale programmer to try out their devices as I used to program in 65/6800 years ago but their sotware is a silly price).
The code can be written, compiled and programmed from within the one program and IMO is very straightforward once you work out what does what....
If I get the pickit3 do I need to get anything else special to connect to the pcb? Or is it just the pickit and the Mplab software?
Oh, and what can I look up to start learning how to program pic chips? Is there a certain programming language that is used?
My kit is now working (minus the last Nixie which I messed up & am waiting on a replacement for). I've got it sitting on a piece of cardboard under my TV so I can sit and watch it. This evening it's ever continuing pattern of switching between temp & humidity changed and caught my eye. The three digits were counting down together... 999, 888, 777...222, 111 along with tube 4 changing through it's elements. When it finished it's countdown, it went back to it's normal operating mode. Is this some kind of Easter egg or a reset cycle or???
You'll need to make up a connecting lead, just a 5 pin .1" SIL plug to wire ends which can be soldered onto the board, or buy one with a ZIF socket adapter you can drop the IC into.
Plenty of info one the net but I wouldn't know the best place to start these days, been using these things for 20 years now
sean4star wrote:
If I get the pickit3 do I need to get anything else special to connect to the pcb? Or is it just the pickit and the Mplab software?
Oh, and what can I look up to start learning how to program pic chips? Is there a certain programming language that is used?
It's a cathode cleaning sequence, it makes sure all the digits are used regularly to prevent 'poisoning'.
adminbear wrote:
My kit is now working (minus the last Nixie which I messed up & am waiting on a replacement for). I've got it sitting on a piece of cardboard under my TV so I can sit and watch it. This evening it's ever continuing pattern of switching between temp & humidity changed and caught my eye. The three digits were counting down together... 999, 888, 777...222, 111 along with tube 4 changing through it's elements. When it finished it's countdown, it went back to it's normal operating mode. Is this some kind of Easter egg or a reset cycle or???
Here's an oddity... when my unit is displaying humidity of "56%H", there's a flicker near one of the pins in the tube showing the "5". It's below the "base plate" inside the tube. However when it's showing "75.3 F", it's not there. Same tube, same number, just in the humidity display, there's something else showing up. Any idea??
Thanks,
jack
Hi i have just recently received my thermometer from think geek and I have assembled the PCB up to the first stage of testing and when I put my multimeter across R28 I get no reading set to the 1A scale. I have inspected the board for dry joints and bridges, its all good no bridges or dry joints found.
Here are pictures of the front and back of the pcb
http://imgur.com/a/2zGXg
Thanks any help would be appreciated.
It could be slight leagage around the driver transistor, if there's anything conductve such as flux which may get slightly damp. Try cleaning any flux residue from under the driver transistors.
adminbear wrote:
Here's an oddity... when my unit is displaying humidity of "56%H", there's a flicker near one of the pins in the tube showing the "5". It's below the "base plate" inside the tube. However when it's showing "75.3 F", it's not there. Same tube, same number, just in the humidity display, there's something else showing up. Any idea??
Thanks,
jack
Check your multimeter fuse and the meter is working OK. Check the power supply is producing 5V and try another USB lead just in case it's faulty if it's the type with a plug-in lead. There is so much connected to the 5V line there should be some reading if power is getting to the board.
Moharmate wrote:
Hi i have just recently received my thermometer from think geek and I have assembled the PCB up to the first stage of testing and when I put my multimeter across R28 I get no reading set to the 1A scale. I have inspected the board for dry joints and bridges, its all good no bridges or dry joints found.
Here are pictures of the front and back of the pcb
http://imgur.com/a/2zGXg
Thanks any help would be appreciated.
Thank you I was previously checking with the three meters that I have and didn't even think that the fuses could of blown on all of them, made a make shift fuse and checked and all is working now.
thanks.
Hello, I have recently received my kit (latest available version), but I have noticed that I am missing the 100R resistors? Can I have the exact specifications for them, to see if I could buy them at my local RadioShack or something?
Not there at all?. Sorry
I don't usually miss a whole component strip.
They're just plain 1/4 watt 5% so won't be hard to find, anything up to 150R will work.
No problem, I might have just lost them, but thanks!
I have they DIY Nixie tube thermometer. Unfortunately I put it together and its not working. the tubes flash a bit, more if I blow around the base of each tube. The LEDs also will not light. I haven't found any solder bridges. I think I may have gotten the surface mount chip too hot. Any help would be much appreciated. Also checked the voltage between the ground the middle pin and pin 3 and got a reading of 4.7 volts. Between ground and pin one 2.59 volts. I'm using the wrong fuse in my multi meter to check the current i should be using a .3 amp 250v fuse but i put in a .25 amp 250v fuse. I got a reading of 22 mA across r28.
This one could be tricky...
The flickering tubes and no LEDs mean the HV is working but the controler isn't sending anything to them. Did the LEDs work when it was tested before fitting the tubes?. If you're sure the SMD IC has been damaged just remove it for now and make sure none of the tracks there are bridged - it will still work using the DHT11 sensor.
What would help is the current reading in series with R28 - you really need a meter that can handle up to at least 500mA, preferably 0-1A.
Tony wrote:
This one could be tricky...
The flickering tubes and no LEDs mean the HV is working but the controler isn't sending anything to them. Did the LEDs work when it was tested before fitting the tubes?. If you're sure the SMD IC has been damaged just remove it for now and make sure none of the tracks there are bridged - it will still work using the DHT11 sensor.
What would help is the current reading in series with R28 - you really need a meter that can handle up to at least 500mA, preferably 0-1A.
The LEDs did not work before fitting the tubes. I removed the SMD IC and the tubes still flicker no LEDs though. I could try getting into one of my campus engineering rooms and use a better voltmeter.
Could you measure the voltage across one of the LEDs? - it should change every few seconds depending on display mode. Also any sign of IC1 or 2 getting hot?.
Tony wrote:
Could you measure the voltage across one of the LEDs? - it should change every few seconds depending on display mode. Also any sign of IC1 or 2 getting hot?.
D2,3,4 go between 0v and .55v. D5,6 go between 0v and .45v. Neither of the ICs are getting hot.
One last check you could make before it starts to get complicated... can you measure the voltage at each end of the LEDs to ground?. It would be a good idea to remove L1 for now as you won't need the high voltage supply until the LED problem is fixed and there's a risk of shorting it to the low voltage side if a meter probe slips.
Hi Tony,
I wondered if you could help me with some problems I'm having with my build?
In a nutshell, I can't get the first stage power-up test to work. No LEDs light up and I have no current across R28.
To begin with, I think I've damaged IC4. I didn't scroll down the instruction page far enough and initially installed it upside-down.
When removing it I probably overheated it (because I melted DHT11).
I also damaged the tracks on the board, but I believe it's all connected okay (I made a solder bridge across pins 5, 6 and 7).
I possibly have a problem with D17. I can get the other LEDs to light dimly if I connect my meter in test-tone mode. It also helps me check polarity.
I can't get D17 to light. I also can't get D1 to light, but it may need more power for me to see it through my camera viewfinder.
Lastly, there's confusion with T12. I have version 1.11a and the assembly instructions say that T12 should have two legs. Mine has three legs, is that a problem?
I'll pick up another temp/humidity sensor today and also an LED to replace D17. I can't get a new IC4 quickly, but in another post you said the board should work without it.
I've double checked and re-soldered every component on the board, so there aren't any dry joints or incorrect solder bridges.
Apart from the obvious melted components, do you see any of the other points causing the board not to power up?
Thanks, Dale
Hi,
First check the current range fuse in your meter, I know it sounds silly but you'd be surprised at the number of times it's been the problem. D17 is only an 'on' indicator and isn't needed so don't worry about replacing it for now, it may be OK once the board is powered up.
It will work fine without IC4 just with less accuracy. They're a serial IIC sensor made by a few different manufacturers and sold under other numbers such as LM75, TCN75, DS75. The price usually reflects how accurate they are, the supplied version should be +- 1 degree C.
T12 will work with either 2 or 3 legs as the third connection is made by soldering the heatsink tab to the PCB, I just end up using whichever version RS has enough of in stock at the time I order.
That is a good point about the instructions, I've swapped the order the pictures are shown in. I doubt there are any V1 kits left to be built by now.
Hi Tony,
I checked the fuse with my other meter and it's okay.
I also removed D17 and checked it off the board. It's also okay. It must've been C5 that was drawing power from the meter.
The only temp sensor I can get nearby is a DHT22. It's bigger, but it should work.
I still don't know why I'm not getting anything to fire up.
It might be worth checking the voltage between the R28 pads just to make sure the power supply and USB lead are OK, I haven't had a faulty supply yet but once did have an o/c lead.
If there's around 5V across there then try temporarily fitting R28 and try powering up again. You've checked it for shorts so it should be OK.
I wouldn't use the DHT22 unless you can't avoid it, it's pin compatibe but quite a bit bigger and won't fit easily into the case. How badly melted is the DHT11? if it's just the plastic it might still work.
Hi Tony,
I don't know what happened, but it's working.
It could be that my meter just wouldn't measure across R28 correctly.
I did have another go at cleaning up some solder connections. After a good clean with quality contact cleaner (highly recommended), there were a couple of spots that looked a bit suspicious.
Anyway, I now have the nixies flickering back and forth. I just have to figure out how to get it to display a temperature value. Maybe it's not getting a reading of any kind. I'll just have to read the instructions!
I'll change the DHT22 back to the DHT11 and see what happens. I'll try the original IC4 back in again. If I have to get a new one of those, I'll get a new DHT11 as well.
Thanks for your help!
Hi Tony.
One more little issue.
When I assemble everything, the nixies just cycle through modes continuously.
The IR signal is being reflected inside the case. Waving my hand over it doesn't do anything at all.
Any clues?
Thanks, Dale
Hi Tony,
Never mind. I figured out what to do.
A small length of black heat shrink tube over the IR LED to direct the light straight up instead of bouncing around inside the case.
It looks great.
Excellent kit, Tony!
Can you post the overlay of the new er version PCB?
Hi,
I've added them to the first post of this thread.
Thanks! Just finished building the PCB. Works wonderfully without a hitch!
Excellent
Do you still plan to try hacking it?. One mod I'd wanted to try but haven't had a chance to do is a barometric pressure sensor, there's a 'P' (Pascal) symbol available in the IN19A.
Hello, I've just finished building my PCB right up to the point of the first check (ammeter across the pins of R28). My multimeter doesn't do mA
.
When I plugged it in then touched both legs of the resistor to the pads on R28, I get a single momentary flash from D17 then it goes off. Checking across the pads with R28 off I get a touch over 5v. With R28 on I get just over 0.313v. Voltage drop = current * resistor size, so I should be looking at .313v/.47 ohm = .666mA?
Coil L1 and tubes are not in place.
Checking all the diodes I get .55v drop forward and 0L (ie no connection) reverse. Except D10... there I get .51v forward and .88v reverse. Is there something hooked up in parallel with this one or is it bad? Would this cause my problem?
Bear with me I'm pretty new to electronics.
D17 is connected to the 5V supply and should be lit all the time it's connected. What voltage do you get between R28 and ground with it fitted?.
It looks like the power supply is going into current limit mode due to a short somewhere.
I'm seeing ~2.2 volts.
The D10 diode is nothing to worry about then?
Pics of the underside of my board:
https://plus.google.com/117440165111006 ... iEC1yxezpd
D10 isn't connected to anything that can cause a problem just now. It's either a partial short, faulty power supply or USB cable. It's rare but I have had one fail previously.
What is the resistance to ground measured at each end of R28? that may indicate if it's a short.
It's a little weird.
With R28 in place, the left leg gives me ~7.6kohms, but it starts up in the multi megohm range and goes down then up then down oscillating slowly before it settles on that value (takes about a minute). The right leg gives somewhere around 13kohms... even after a full minute it was still rolling up and down.
With R28 out, the left leg gives me 0, the right leg gives rougly 32kohms.
This is unpowered and the using the shield from the USB port as the ground.
Connected to the [apparently more powerful] USB port on my netbook and lo and behold, the 5v indicator LED came on and stayed on, and I started to get D6 and D5 more dimly (I believe this is by design?) illuminating.
But then I smelled something burning and noticed the DHT11 humidity/temp sensor imploding. It got hot internally and did a literal shrinky-dink! It's toast. Good thing I already ordered an extra to do an external hook up...
I checked for continuity between its pins and didn't find any, but then I flipped the board over and checked the SMD sensor on the other side and found the three pins on the upper left have continuity.
I unsoldered the toasted sensor and the voltage at R28 went from 4.2V to 5.1V.
I've gone over the SMD sensor on the back with a magnifying glass and I can't see any solder bridging and it doesn't grow warm when the board is powered. Should I unsolder it? No idea how to get it off there without damaging it.
Where the DHT11 was I get 5.1V to ground from the top three pins and the bottom pin is 0.3mV
That is weird...
The resistance should have been the same at both ends with R28 in so it looks like it's been damaged by a short. The 0 ohms reading after removing it, can you trace what was moved or bridged to cause that as it may have been responsible for the original problem?.
Edit - just saw your last post and it looks like you found the short
Was the sensor fitted with the label facing upwards?, I'm guessing so by the distortion and lead length. The SMD sensor sounds OK, those 3 pins are linked together.
Yeah, the sensor label was facing upwards... meaning I had it installed backwards like an idiot.
I guess it's ok to move on with the next part of the build then while my new one comes in the mail?
You should be OK finishing most of it off now but only fit the 2 rightmost nixies (the symbol tubes) as the rest won't light until the sensor is replaced, just in case there's a problem with the LEDs. If you can get them to light '%H' then the rest should work ok once you have the new DHT11.
The rest of the LEDs lit when I left it on more than a moment with the temp/humidity sensor removed and changed it to the demo mode where the lights run back and forth... so I went ahead and tested it with all the nixies and coil in place unsoldered (dangling upside down while holding the board by the edges with all the nixie legs sticking through and just barely not touching one another) and they lit! That was super sketch and a huge shock hazard
.
I tried putting that half-melted sensor in the right way and it's still working and giving humidity measurements that agree well with my thermostat. No heating in the correct orientation.
It's now complete except the final case sanding, thanks for the help with the troubleshooting
Hi Tony,
I just built my third one of these (this one's mine).
I found a small error in the updated instructions.
R29 isn't mentioned which is needed to light up D17.
Where the installation of the 1K2 resistors is shown, the photo shows six resistors circled but the text only mentions five.
If it wasn't circled on the photo, it would be very difficult to work out where it went because the PCB has two places for R29.
Cheers, Dale.
Thanks for pointing that one out, I thought this was another consequence of me messing around with the instructions to remove the v1 parts but it appears it's always been like that.
Three kits?, you should have asked for a bulk discount
Hello everyone
I just wanted to say that, with Tony's help, my kit is working perfectly (my problem was no Nixies lighting up and it turned out to simply be a dry joint on R10 - how humiliating
)
Incidentally, I also needed a short length of black heatshrink over the IR LED to stop it getting out of control. It was fine right up until the last top thick ring on the case without the heatshrink, then it went unstable.
I shall keep an eye on this board to see if a barometric pressure mod comes available in the future
Thanks Tony for a fantastic kit and great firmware.
Neville
Hello,
I'm now running into the problem that if I leave the thermometer on for more than a couple days, it seems to stop displaying/responding to input.
Typically, I would like to put the nixies to sleep when I leave or go to bed and switch it to all off or blue LED only mode. But if it's been on a couple days, often I wave my hands over it and nothing happens. No mode change or anything. I have to unplug it and plug it back in.
Likewise, I've accidentally left it on over night or while at work and realized it shut itself off and went to this same state. You can see the IR LED on through the black plexi, but nothing happens until power is interrupted.
Any ideas?
We had what seemed to be a bad batch of processors last Spring, up to now 6 I know of have had this problem of latching up randomly.
It caused me a lot of trouble as I was using one of them when working on the clock software, I wasted a lot of time chasing a bug that was causing random crashes that didn't exist.
It must be an older kit, certainly pre-socket probably from a batch made up around last summer. If you PM me your address I'll send out a replacement or if you have a programmer you can program another using the code posted on here.
OK, YGPM.
Sorry its been a while. I measured the voltages on the LEDs in comparison to ground the flat side of D1 stays at 0.12v and the rounded side stays at 4.41v, D2,3,4,5,6 flat side stayed at zero. D2 rounded side flipped between .74v and .12v, D3 rounded side flipped between .81v and .12v, D4 rounded side flips between 1.08v and .12v, D5 rounded side flips between .69v and .12v , D6 rounded side flipped between .70v and .12v. D17 flat side stayed at .12v and its rounded side stayed at 5.01v.
I'd guess either the LEDs are the wrong way round (don't trust the notches, the only reliable indicator is lead length) or the MPSA42/92 transistors are incorrectly fitted.
Can you post a photo of the board at an angle that will show the LEDs from the front and the transistor markings/position?.
Thanks for the hep they were backwards. I had assumed that the flat side should have matched up with the board. I'm surprised that everything works since the board was falling apart when I was desoldering it. (PCB's weren't meant to take that much heat.)
Hey Tony,
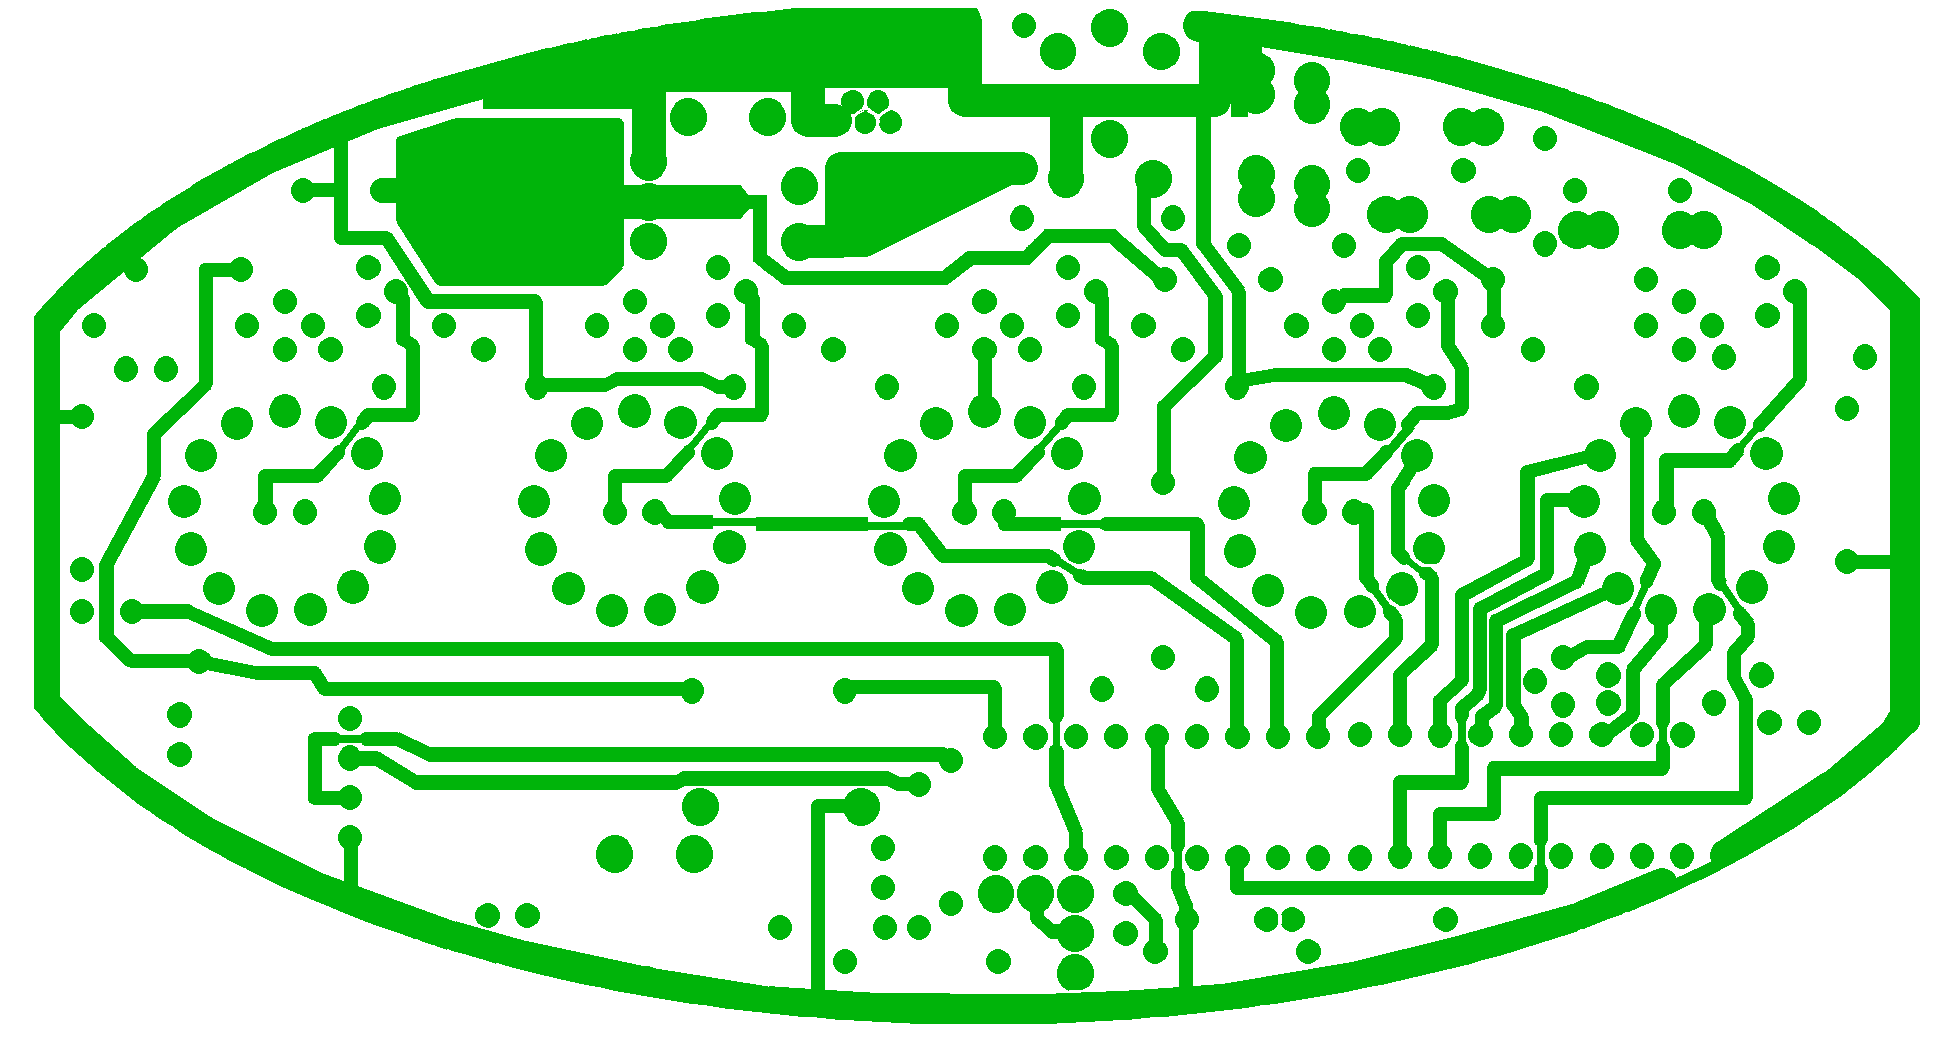
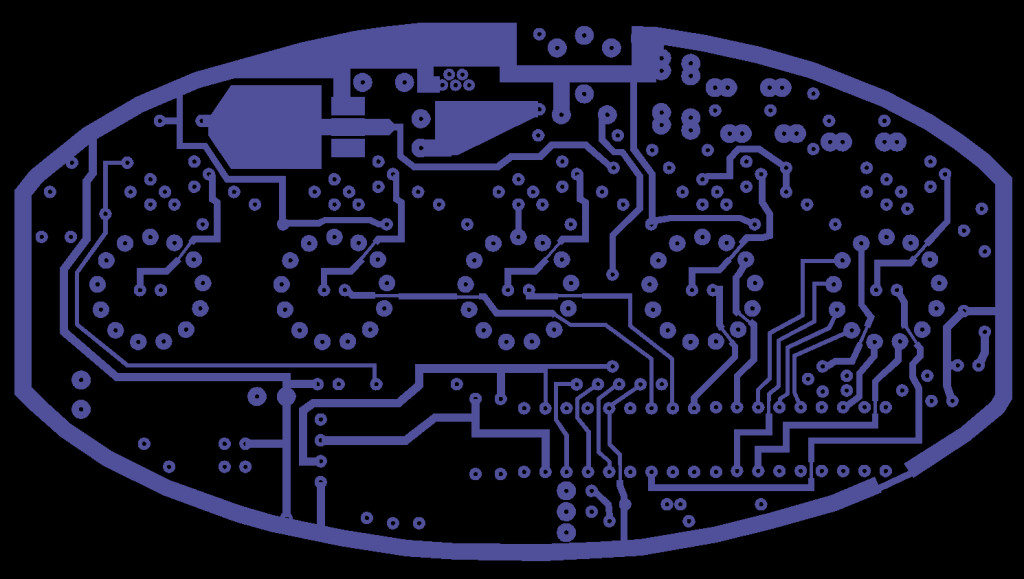
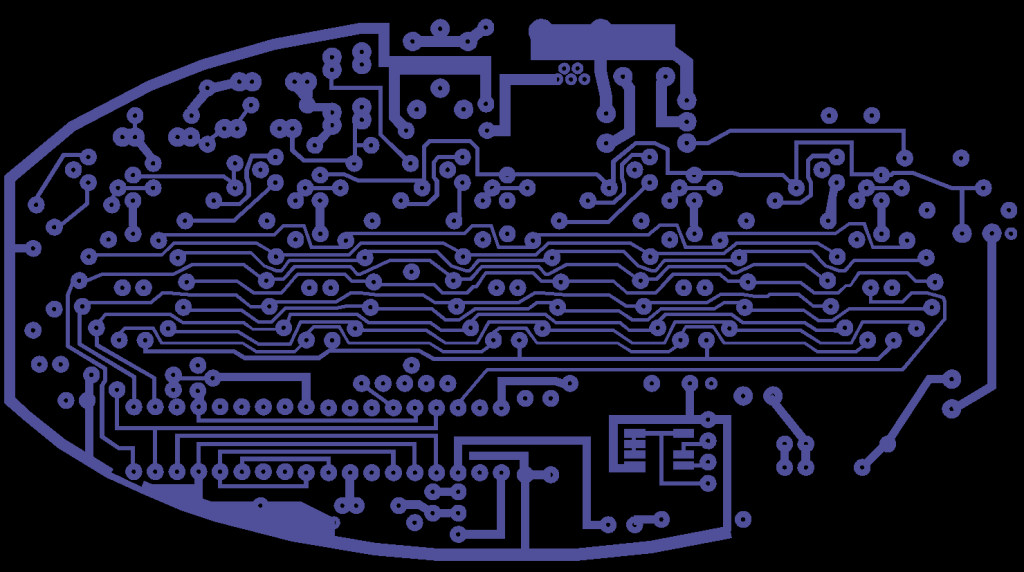
I have been having some troubles with my V2 thermometer lately. It had been working great for the last 2 years, sitting on my entertainment stand. Lately I've noticed that the temp display would 'lock-up' and stick on an incorrect temp. The display would still switch from K, to C to F and H properly, but not update the temperature. I picked it up and blew the dust off of it, this made several of the elements on all the tubes light up. I unplugged the power, disassembled the case and thoroughly cleaned all the dirt and dust from the board, reassembled and all seemed well. A few days later the same thing, temperature not updating. This time I tried unplugging the external sensor I had made, but the temperature didn't change to a higher value as expected. (I got lazy and never swapped coil L1 for the smaller one
). I removed the power cord then plugged it back in, only the last 2 tubes would light. the first 3 still lit, but only for the transition effect, also the 3 decimal points on the left 3 tubes would all flicker. Pulling the power cord again and plugging back in a second time, nothing would happen, like no power. I didn't have much time to mess with it this morning, so I left the power cable out and went off to work. I came home and plugged it in only to have it work fine. Seems to me the controller IC is starting to give up after running for a few days. I did see your post about a batch of faulty ICs. Your thoughts?
Update
Today the temp display locked up again. After cycling the power cord, the thermometer no longer powers up at all, so at least I have an issue I can chase. Ill take it apart and begin checking voltages this weekend.
I've not known a faulty processor to cause problems like this up to now though it's possible and if it's 2 years old will be an earlier batch with 16f1847s. The 3 numeric tubes not displaying is usually the DHT11 but could be the PIC not reading the sensor if it is faulty. Could you measure the voltages on all pins and let me know?.
Even with an external sensor connected, will a fault with the internal sensor still cause this?
It could as the software expects to see it at all times even if it's just displaying data from an external sensor.
Hi Tony,
I wondered if you could help with a problem I'm having with my thermometer.
I have mine on a timer, so it switches off during the night and while I'm at work.
This morning when it turned on, the second last (celcius) nixie was the only one lit up. It also wasn't lit correctly, like all of the symbols tried to come on at the same time.
This has happened a couple of times before and disconnecting and reconnecting the power has always worked.
Not this time. After reconnecting the power, none of the nixies light up.
The LEDs are working correctly and I can tell that the IR sensor is getting it to change modes, but nix on the nixies.
I've tried different power supplies, but I can't make them work.
Any ideas?
Can you remember if the LEDs worked correctly when the single tube lit up? if so then the pic would be OK and the problem is on the HV side. You'll need to go back to the tests after fitting L1 - check the voltage across the pads for C6, there should be 180-200v there.
If not, see if L1 or T12 are getting warm. If the voltage is OK and given the fault description, it might be the KM155ID1.
Hi Tony,
I'm pretty sure the LEDs were lit up.
I'll dismantle it and check the points you mentioned.
Thanks,
Hi Tony,
I'm measuring only about 3 volts at C6b and nothing at C6a (mine is a v1.11a PCB).
L1 and T12 are stone cold.
I've re-soldered everything and still not working properly.
I have noticed that the LED under the 4th nixie (D5) isn't working either.
For some reason, I can measure continuity across D5 (12 ohms), which shouldn't be there.
That LED connects to the middle leg of T8 and pin 1 of IC1, doesn't it?
Would that provide a clue?
It shouldn't be related to the no HV fault but as it's the same tube that had a problem and was the last to light, it can't be ignored.
What is the voltage on pin 1 and pin 9 of IC1?. A shorted D5 would not on its own stop anything working except the LED itself.
I get around 2 volts across pins 1 and 9.
Sorry, I should have been more specific. Could you measure the voltage to ground on each pin?.
Hi Tony,
Using the ground on the USB connector, I get a steady fluctuation between zero and 0.4 vdc at pin 1 and a steady 2.1vdc at pin 9.
I used a better meter this time because my cheap one was giving readings with only one lead touching.
With the good meter, I get nothing at all on the pads where C6a and C6b would go if they were there.
Could you measure the voltage across R1 and from the tab of T12 to ground?. It might be worth making sure T12 doesn't have any dry joints - if not it looks like it may be o/c.
I'll check when I get home. Thanks
BTW What do you mean by o/c?
Hi Tony,
with one lead on the tab of T12 and the other on one end of R1, I get fluctuation between 2.5 and 5 volts.
At the other end of R1, I get fluctuation between 4.6 and 5 volts.
Another worrying development. I noticed D17 flickering. When I took the PCB out of my PCB clamp, the LED went out. If I flex the board a little, it turns on and off.
There can't be any dry joints, I've re-soldered everything.
D17 is connected, through R29, across the 5V supply. If it's flickering either the resistor, diode or the supply is the problem. Try pushing the resistor and diode to see if there's an internal bad connection causing it to flicker. I doubt it is so once you've confirmed the LED is OK you'll need to trace where it's going missing. Try pushing on the USB socket and R28.
Hi Tony,
I'm getting nowhere with this and think I should start replacing components.
Without a circuit diagram I can't figure out why the nixies won't work (Even if I had one, I'm not sure it would help lol).
The LEDs seem to be working now, though.
Where do you think I should start? Should I replace T12 first?
I can order most items from RS, but I'd prefer to just order once to save postage.
The nixies aren't working due to the missing HV supply, from your faultfinding I'd say T12 is faulty but before replacing it you'll need to find out why the 5V supply is dropping out as this may have caused it to fail. The only parts that would cause D17 to flicker are the USB socket/plug and R28. D17/R29 could be faulty but that would only be an indicator problem, the 5V supply will still work.
How many spare components do you have on hand? Other than T12 there may not be much you need to order. If you want to cover everything a couple of each NTD5865, MPSA92, MPSA42, 10x 1N4148 diodes and a coule of spare fusible resistors. The only other parts you might need to replace are the PIC and the 74141/KM155ID1.
Hi Tony,
Thanks for replying at this busy time of year.
As I half expected, I need to source these components from all over the world. The only items I can get in Australia are the diodes and some of the transistors.
I'll get the T12s from RS and the rest off eBay from Hong Kong.
It seems that almost no-one has the fusible resistors (at least not in 0.47ohm). Do you think this
eBay item
is compatible? It's the only one I can find anywhere.
Cheers, Dale
Hi,
You should be able to find all the parts at RS or Farnell except the KM155, though the pack sizes can be a problem. I use RS, Farnell and Rapid over here.
Yes that resistor is compatible, the seller you linked to just dumps the entire Farnell catalogue onto ebay with a big markup so it's exactly the same part originally supplied. These links might be some use:
http://au.element14.com/on-semiconducto ... dp/1879964
http://au.element14.com/multicomp/mpsa9 ... dp/1574392
http://au.element14.com/fairchild-semic ... dp/1017719
http://au.element14.com/te-connectivity ... dp/1898500
Cheers Tony.
I searched the element14 Australian site and couldn't find those resistors anywhere.
It doesn't help that they're not noted as fusible.
They'd still have to come from the UK, but at least they're a lot cheaper.
I found the same ones on the RS Austalia site and they're local stock, so I'll go for those.
Thanks very much.
Hey Tony,
A while back I had asked about my thermometer kit that was acting strange and sometimes not powering up. So I finally got around to looking into it. I did replace the DHT11 and allowed it to run a day. After about 8 hours the display would freeze at the same temp, a few minutes later the first 3 tubes would not display numbers, but would light during the transition effect. After a few minutes of no numbers, the whole thermometer would stop all display, including the LEDs, as if no power. If I unplugged the USB and allowed it to set for about 20 minutes, it sometimes would power back on, starting the whole process over. Going by you earlier post about a bad batch of PIC16F1847s. I got adventurous and decided to pickup a PIC programmer on the cheap. For $25 I bought a Chinese knockoff of a PICkit3. The included PIC board wasn't much help, I was not able to figure out the jumper and PIN layout, as all the documentation was in Chinese. Not too bad in all, considering it came with MPLAB IDE and MPLAB X IDE. I also picked up a replacement PIC16F1847 then attempted to learn PIC programming. After some fumbling and trial, I was able to program the replacement PIC with the code you had provided. MPLAB kept giving the same error for 'Unable to get device ID', but MPLAB X allowed me to skip the ID error. I've had my thermometer running all evening with no issues so far. I will see if this works.
I have just 1 question: What is the nominal voltage to power up a PIC for programming? 3.5v? 5v?
Those clone programmers work well, I've used a couple. The programming should be at 5 or 5.5V for a 16f device. The 'device ID' error is unusual thoughI've only used MPLAB IDE 8.x with them, it might be a X compatibility problem.
I just finished my thermometer and all the parts are in except the LEDs for the tubes and the on-off LED and the IR LED and R28. I am getting power from the transformer to the PCB- USB at about 5 volts. I check R28 and it's about 80 ma. The problem I have is that the voltage to all the LED pads is less than 1 volt. Also, when I check the voltage from the + side of the PCB to the - side from pads on the PCB that go directly to the + and -, I also only get less than 1 volt, even though the pads at the USB are 5. What's my next step.
Temporarily fit R28 and measure the 5V again, check IC4 is the correct way around. There won't be a high reading on the LEDs as they're driven by a PWM signal, to your meter it will look like 0.5-1V.
I'm completely frustrated. I had it all together and it was working beautifully... but when I assembled the case, the ir control wasn't working. I determined the that the ir led was too far down and not "showing" through the plastic lid... so I attempted to bring it up a little, and when I plugged it back in... NOTHING! D17 lit up fine, and I was finally able to get the fourth tube (to light up and a few seconds later, the other tubes faded in to life and the leds underneath lit up... whew... then I had to disconnect power to get it all back together and plugged it back in and... NOTHING AGAIN... and still nothing...
I am new to electronics, have fairly good soldering skills, but am a dummy when it comes to technical jargon. I understand the basics of electricity and part names, but don't really understand troubleshooting well... oils you walk me through a check of the board? I am frustrated and don't want to throw it through the window just yet...
Hi,
The actual problem was too much IR being reflected from the lid, swamping the sensor. The meatshrink MUST seal all the way to the lid with no gaps.
I'd guess it's just switched off, make sure the heatshrink is in place and no IR reaches the sensor until needed and it should change mode and work. Use a phone camera to view the LED just to confirm it's still emitting IR.
Thanks for the prompt reply! And thanks for the phone trick... I didn't realize it would "see" it, that would've saved me a lot of frustration last night when I broke the ir led (that's why I asked the wavelength value in the other post) because I need a replacement. I got the part about the heat shrink, just didn't know which ir nm value was which.
If you have any scrap or unused IR remotes you could probably use the LED from that, the type isn't critical as long as it's the correct wavelength.